
Boss Locations, Abilities and Difficulty Conditions
Use the boss directory to compare encounter abilities, difficulty-specific stats, and rewards. Blood Brother is an opponent within a regional boss encounter.
For the Journey's Demon King objective, head to Infinity Castle for Thriller King. Marineford contains Red Dog and Dragon Emperor; Shibuya Station contains Curse Tyrant. The BP beside an opponent in the area menu is an opponent label, not a stated area-unlock requirement. See the areas and Teleport guide for destination navigation.
Start a Challenge and Read Its Rewards
- Equip your battle team before approaching the boss.
- Use the boss's interaction prompt to open its challenge panel. At Endeavor, press E at Challenge Boss.
- Select an available difficulty. Match it to your quest before starting.
- Inspect Enemy Team or Details, including the enemy's abilities, then press Battle!.
- After winning, check the first-clear notification and the BEATEN and Ready in indicators.
A first clear of a new boss/difficulty combination grants +0.25 Flat Luck. Repeating a combination you have already cleared does not award that first-clear bonus again. Bosses can also drop rare items.
After a Normal victory, Cart Titan, Red Dog, and Curse Tyrant have an approximately five-minute recovery. Use the selected encounter's Ready in timer to determine when it is available again.
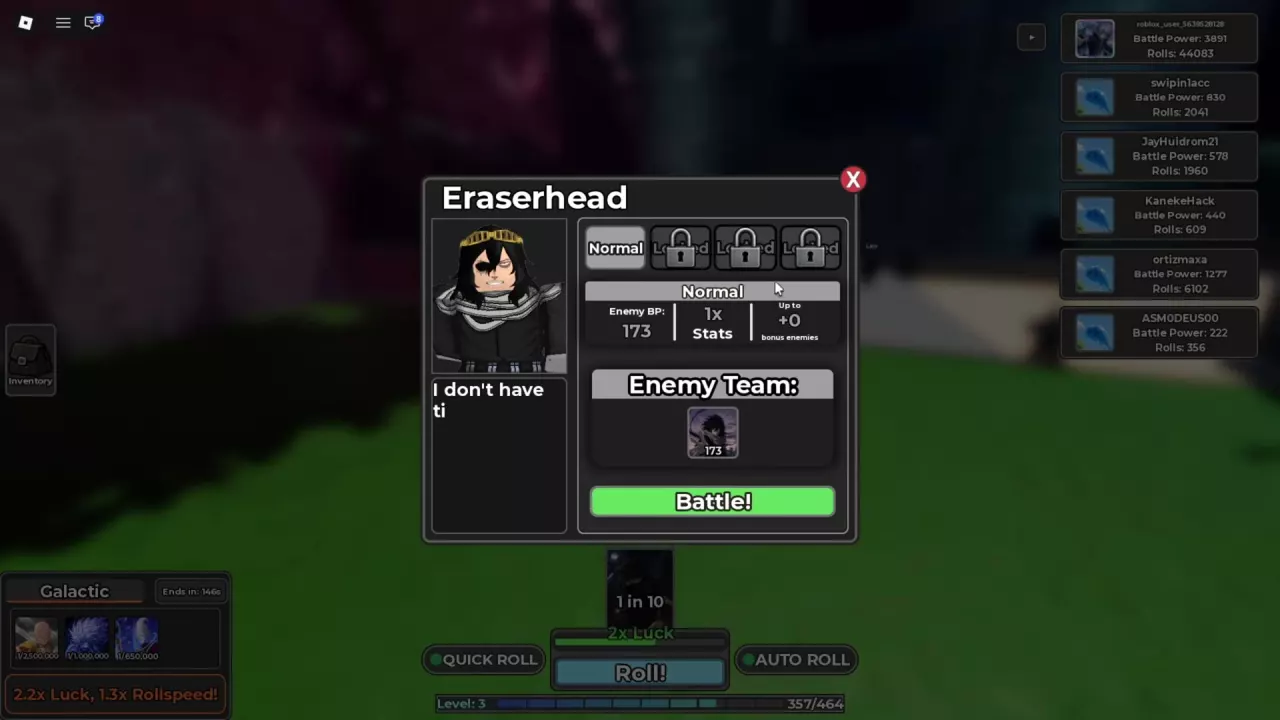
Prepare for Silence, Rescue and Backline Damage
Choose your team around the enemy's trigger conditions as well as the stats of the card versions you own.
- Eraserhead — survive the opening silence. Erasure disables the opposing card's abilities for two turns on entry. Favor an opening card with enough health to withstand those turns; do not make your plan depend on its opening ability activating.
- Cart Titan — plan for an interrupted finish. When an ally falls below 25% health, Cart Rescue moves that ally behind Cart Titan and gives it a shield that blocks one attack. The effect can activate at most twice, with one Cart Titan allowed per team. A nearly defeated enemy can therefore leave the front line and survive another hit. Favor a team that can keep dealing damage through the rescue rather than relying on one burst to finish the encounter.
- Present Mic — protect more than the front card. Each attack also hits one random opposing team card for 15% of Present Mic's attack. Keeping a fragile card in reserve does not reliably protect it from this extra damage.
- Blood Brother — account for bleeding and the next card in line. Attacks apply a two-turn bleed that deals 6% maximum HP per turn, and Blood Brother heals for 50% of the bleed damage dealt. Every fourth turn, Piercing Blood deals 2× damage and also hits the card behind the target for 40% damage. Give that next card enough survivability to remain useful when it enters; prolonged fights also give the bleed-and-heal effect more time to work.
For equipping Party and Support cards and arranging their order, use the team-building guide. Compare the available defensive and offensive effects in the support-card guide.
Dragon Emperor and Boss-Specific Ability Limits
Dragon Emperor changes the balance of the fight as its health falls:
- Above 50% HP: Dragon Form reduces incoming damage by 30%.
- Below 50% HP: it loses that damage reduction and doubles its attack through Thunder Bagua.
- On attacks: it has a 25% chance to stun for one turn.
- On death: its 35% death-damage effect hits the card that defeated it.
Treat the lower-health phase as a damage race with a survival cost: Dragon Emperor becomes easier to damage, but its doubled attack and stun chance can punish a weakened front card. Keep enough health in reserve for that phase and the final retaliation.
Copyblade Mentor can temporarily copy Dragon Emperor's transformation ability. This makes it a useful option when you want access to the same defensive and offensive effects, but the copy is temporary; choose the actual version you own with its stats in mind.
Crimson Warlord's Tengai Shinsei meteor does not affect Boss NPCs. Its listed 1.3× attack damage and 20% damage reduction still give you reasons to consider it, but do not choose it for a boss fight expecting the meteor's maximum-HP damage to carry the encounter.
Journey Clears, Hard Mastery and Repeat Fights
Match the named objective to its boss and difficulty:
| Quest objective | Required boss clear |
|---|---|
| The Journey: Into the Arena | Defeat Cart Titan on Normal. |
| The Journey: Demon King | Defeat Thriller King in Infinity Castle. |
| The Journey: The Final Arena | A Normal Curse Tyrant victory completes this objective. |
| Mastery Stage 5 | Defeat Curse Tyrant once on Hard. A Normal victory does not satisfy it. |
For Mastery, open Quests → Quest Lines → Mastery to inspect Stage 5. After the qualifying Hard victory, return to Quests to claim five golden ringed fragments and eight Shrine Fragments. Use the quest guide for the surrounding objectives and the crafting-material directory to look up material uses.
Fix “already in a battle”
If a challenge returns “Cannot battle, you are already in one!”, check for an active battle or tower run. Finish or end that battle, then return to Challenge Boss. Closing the battle screen and returning to the world does not necessarily end the encounter.
An interface with a BATTLES list can support concurrent encounters, including Infinite Tower and Dragon Emperor together. Follow the battle state in your active interface: when it blocks a new challenge, resolve the existing fight first.
Automate bosses you have already beaten
The Auto Boss! gamepass makes bosses you have beaten fight themselves when ready, including while you are AFK. You must defeat the boss first, so this is a repeat-fight convenience rather than a way to bypass the initial win. See gamepass purchase choices for the broader comparison.
Raid Currency and Relic Purchases
Defeat raid bosses to earn their corresponding currency, then spend it to buy cards or relics. The Teleport menu includes a Raids tab.
This currency-and-purchase loop belongs to raids; the regional boss first-clear Flat Luck reward is a separate reward system.